Mac OS X equivalent of the Ubuntu "tree" command
Is there an equivalent to the Ubuntu tree command for Mac OS X?
13 Answers
You can get the tree command on macOS, too. If you have Homebrew:
brew install treeIf you do not have Homebrew installed, try one approach below.
Installing a package manager approach
Follow the instructions on these websites to install Homebrew, MacPorts, or Fink. Do not install more than one package manager at the same time!
Follow the prompt for whichever you installed.
For Homebrew: brew install tree
For MacPorts: sudo port install tree
For Fink: fink install tree
Installing from source approach
Install the Xcode command line tools by running
xcode-select --install.Change the Makefile to get it to work, which is also explained in @apuche's answer below. Commenting out the Linux options and uncommenting the macOS options should be enough.
Then, run
./configure, thenmake.Now you have to move the
treebinary file to a location that's in your executable path. For example:sudo mkdir -p /usr/local/bin sudo cp tree /usr/local/bin/treeNow edit
~/.bash_profileto include:export PATH="/usr/local/bin:$PATH"Reload the shell, and now
which treeshould point to/usr/local/bin/tree.
Not exactly the same, but one quick way on the Mac is:
find .and that's it. It will list all file paths in the current directory as a list.
6Or if your administrator won't let you install any of the brew, fink, port tools you can always build it from the source :
curl -O ftp://
tar xzvf tree-1.5.3.tgz
cd tree-1.5.3/
ls -al
Edit the Makefile to comment linux part and uncomment osx area:
# Linux defaults:
#CFLAGS=-ggdb -Wall -DLINUX -D_LARGEFILE64_SOURCE -D_FILE_OFFSET_BITS=64
#CFLAGS=-O2 -Wall -fomit-frame-pointer -DLINUX -D_LARGEFILE64_SOURCE -D_FILE_OFFSET_BITS=64
#LDFLAGS=-s
# Uncomment for OS X:
CC=cc
CFLAGS=-O2 -Wall -fomit-frame-pointer -no-cpp-precomp
LDFLAGS=
XOBJS=strverscmp.o
Optional: Forcing color output
And while you're at it, if you want to force tree to always colorize the output, you can always edit the main method of the tree.c file and add force_color=TRUE; before setLocale(LC_TYPE,"");
Finally hit make and you're done building tree for mac.
Tribute goes to Shaun Chapman for his original post on his blog.
8There isn’t a formal tree command per se however you can do this:
Save the following script to /usr/local/bin/tree
#!/bin/bash
SEDMAGIC='s;[^/]*/;|____;g;s;____|; |;g'
if [ "$#" -gt 0 ] ; then dirlist="$@"
else dirlist="."
fi
for x in $dirlist; do find "$x" -print | sed -e "$SEDMAGIC"
done
Change the permissions so you can run it:
chmod 755 /usr/local/bin/tree Of course you may have to create /usr/local/bin:
sudo mkdir -p /usr/local/bin/tree You should probably be using homebrew. If you do:
brew install treeI found a simple solution here:
So adding the following to your .bashrc, .bash_profile or any other place will make it work:
alias tree="find . -print | sed -e 's;[^/]*/;|____;g;s;____|; |;g'"Now adding a tree command will print like this:
# ~/my-html-app [13:03:45]$ tree
.
|____app.js
|____css
| |____main.css
| |____theme.css
|____index.htmlAn alternative using find and awk:
#!/bin/bash
find . -print 2>/dev/null | awk '!/\.$/ { \ for (i=1; i<NF; i++) { \ printf("%4s", "|") \ } \ print "-- "$NF \
}' FS='/'Here is a Ruby script solution that produces a nice Unicode tree along with useful metadata.
#!/usr/bin/env ruby
def tree_hierarchy( root, &children ) queue = [[root,"",true]] [].tap do |results| until queue.empty? item,indent,last = queue.pop kids = children[item] extra = indent.empty? ? '' : last ? '└╴' : '├╴' results << [ indent+extra, item ] results << [ indent, nil ] if last and kids.empty? indent += last ? ' ' : '│ ' parts = kids.map{ |k| [k,indent,false] }.reverse parts.first[2] = true unless parts.empty? queue.concat parts end end
end
def tree(dir) cols = tree_hierarchy(File.expand_path(dir)) do |d| File.directory?(d) ? Dir.chdir(d){ Dir['*'].map(&File.method(:expand_path)) } : [] end.map do |indent,path| if path file = File.basename(path) + File.directory?(path) ? '/' : '' meta = `ls -lhd "#{path}"`.split(/\s+/) [ [indent,file].join, meta[0], meta[4], "%s %-2s %s" % meta[5..7] ] else [indent] end end maxs = cols.first.zip(*(cols[1..-1])).map{ |c| c.compact.map(&:length).max } tmpl = maxs.map.with_index{ |n,i| "%#{'-' if cols[0][i][/^\D/]}#{n}s" }.join(' ') cols.map{ |a| a.length==1 ? a.first : tmpl % a }
end
puts tree(ARGV.first || ".") if __FILE__==$0
You could modify the meta = … line to extract different metadata to display, hand-picking out the split pieces on the next line. With a little more work you could pass arbitrary ls arguments to select the metadata to show.
Sample output (looks nicer in the OS X terminal than the font on Stack Overflow):
phrogz$ tree UCC_IVI/
UCC_IVI/ drwxr-xr-x 510B Nov 20 11:07 ├╴docs/ drwxr-xr-x 102B Nov 20 19:21 │ └╴CANMessages.txt -rwxr-xr-x 2.2K Nov 20 19:21 │ ├╴effects/ drwxr-xr-x 204B Nov 19 17:19 │ ├╴Depth Of Field HQ Blur.effect -rwxr-xr-x 2.4K Nov 19 17:19 │ ├╴FXAA.effect -rwxr-xr-x 1.6K Nov 17 15:38 │ ├╴HDRBloomTonemap.effect -rwxr-xr-x 11K Nov 17 15:38 │ └╴SMAA1X.effect -rwxr-xr-x 4.4K Nov 19 17:19 │ ├╴fonts/ drwxr-xr-x 136B Nov 17 15:38 │ ├╴Arimo-Regular.ttf -rwxr-xr-x 43K Nov 17 15:38 │ └╴OFL.txt -rwxr-xr-x 4.3K Nov 17 15:38 │ ├╴maps/ drwxr-xr-x 238B Nov 19 17:19 │ ├╴alpha-maps/ drwxr-xr-x 136B Nov 17 15:38 │ │ ├╴rounded-boxes-3.png -rwxr-xr-x 3.6K Nov 17 15:38 │ │ └╴splatter-1.png -rwxr-xr-x 35K Nov 17 15:38 │ │ │ ├╴effects/ drwxr-xr-x 136B Nov 19 17:19 │ │ ├╴AreaTex-yflipped.dds -rwxr-xr-x 175K Nov 19 17:19 │ │ └╴SearchTex-yflipped.png -rwxr-xr-x 180B Nov 19 17:19 │ │ │ ├╴IBL/ drwxr-xr-x 136B Nov 17 15:38 │ │ ├╴028-hangar.hdr -rwxr-xr-x 1.5M Nov 17 15:38 │ │ └╴FieldAirport.hdr -rwxr-xr-x 1.5M Nov 17 15:38 │ │ │ ├╴icons/ drwxr-xr-x 238B Nov 19 17:19 │ │ ├╴icon_climate.dds -rwxr-xr-x 683K Nov 19 17:19 │ │ ├╴icon_music.dds -rwxr-xr-x 683K Nov 19 17:19 │ │ ├╴icon_navigation.dds -rwxr-xr-x 683K Nov 19 17:19 │ │ ├╴icon_phone.dds -rwxr-xr-x 683K Nov 19 17:19 │ │ └╴icon_surroundView.dds -rwxr-xr-x 683K Nov 19 17:19 │ │ │ └╴materials/ drwxr-xr-x 102B Nov 19 17:19 │ └╴spherical_checker.png -rwxr-xr-x 11K Nov 19 17:19 │ ├╴materials/ drwxr-xr-x 102B Nov 19 17:19 │ └╴thin_glass_refractive.material -rwxr-xr-x 6.0K Nov 19 17:19 │ ├╴models/ drwxr-xr-x 136B Nov 19 17:19 │ ├╴BokehParticle/ drwxr-xr-x 136B Nov 19 17:19 │ │ ├╴BokehParticle.import -rwxr-xr-x 739B Nov 19 17:19 │ │ └╴meshes/ drwxr-xr-x 102B Nov 19 17:19 │ │ └╴Mesh.mesh -rwxr-xr-x 1.1K Nov 19 17:19 │ │ │ └╴Glass_Button/ drwxr-xr-x 136B Nov 19 17:19 │ ├╴Glass_Button.import -rwxr-xr-x 1.2K Nov 19 17:19 │ └╴meshes/ drwxr-xr-x 136B Nov 19 17:19 │ ├╴GlassButton.mesh -rwxr-xr-x 44K Nov 19 17:19 │ └╴Icon.mesh -rwxr-xr-x 1.8K Nov 19 17:19 │ ├╴scripts/ drwxr-xr-x 204B Nov 19 17:19 │ ├╴App.lua -rwxr-xr-x 764B Nov 17 15:38 │ ├╴CANSim.lua -rwxr-xr-x 29K Nov 17 15:38 │ ├╴ObjectWiggler.lua -rwxr-xr-x 3.7K Nov 19 17:19 │ └╴PathWiggler.lua -rwxr-xr-x 2.9K Nov 17 15:38 │ ├╴states/ drwxr-xr-x 170B Nov 19 18:45 │ ├╴app-camera.scxml -rwxr-xr-x 2.4K Nov 20 11:07 │ ├╴app-navigation.scxml -rwxr-xr-x 590B Nov 19 18:32 │ └╴logic.scxml -rwxr-xr-x 4.2K Nov 19 18:59 │ ├╴tests/ drwxr-xr-x 102B Nov 17 15:38 │ └╴interface-navigation.scxml-test -rwxr-xr-x 83B Nov 17 15:38 │ ├╴UCC_IVI.uia -rwxr-xr-x 630B Nov 19 17:32 ├╴UCC_IVI.uia-user -rwxr-xr-x 832B Nov 20 17:22 ├╴UCC_IVI.uip -rwxr-xr-x 1.5K Nov 17 15:38 └╴UCC_Menu.uip -rwxr-xr-x 33K Nov 19 17:19Adding a small point to @apuche's answer for OSX El Capitan rootless feature. make install fails since we are not allowed to write into /usr/bin directory.
vikas@MBP:~/Downloads/tree-1.7.0$ sudo make install
Password:
install -d /usr/bin
install: chmod 755 /usr/bin: Operation not permitted
install -d /usr/share/man/man1
if [ -e tree ]; then \ install tree /usr/bin/tree; \ fi
install: /usr/bin/tree: Operation not permitted
make: *** [install] Error 71
vikas@MBP:~/Downloads/tree-1.7.0$
To overcome this, just edit Makefile to have prefix = /usr/local
It's not as pretty as gnu tree ... but it's real easy to alias in bash ... You can even add a little color by tacking the G option on to osx's ls color.
alias tree='find . -type d | ls -lARG'Install Xcode
Get Command Line Tools
xcode-select --install- Install Homebrew
ruby -e "$(curl -fsSL )"- Install tree
brew install treeLate to the game, but I had the same question. Due to workplace restrictions, I couldn't install a package from source or via a third-party package manager.
This is my implementation:
#!/usr/bin/env bash
#
# Faux tree command.
#
# Recursive directory/file listing of present working directory (PWD),
# with summary count of directories and files.
# Argument:
# Directory of interest,
# e.g.: tree /Users/foo/foo_dir
# Output:
# Recursive directory/file listing of named directory,
#
# Argument:
# Directory of interest, with user-defined level of resursive depth,
# e.g.: tree /System/Library 2
# Output:
# Recursive directory/file listing of named directory, stopping at
# user defined depth of recursion, e.g. 2
tree () { [ -n "$2" ] && local depth="-maxdepth $2"; find "${1:-.}" "${depth}" -print 2> /dev/null | sed -e 's; [^/]*/;|____;g;s;____|; |;g'
}
Simply add the function to /Users/foo/.profile or .bash_profile,
then refresh the profile with: source .profile or: source .bash_profile
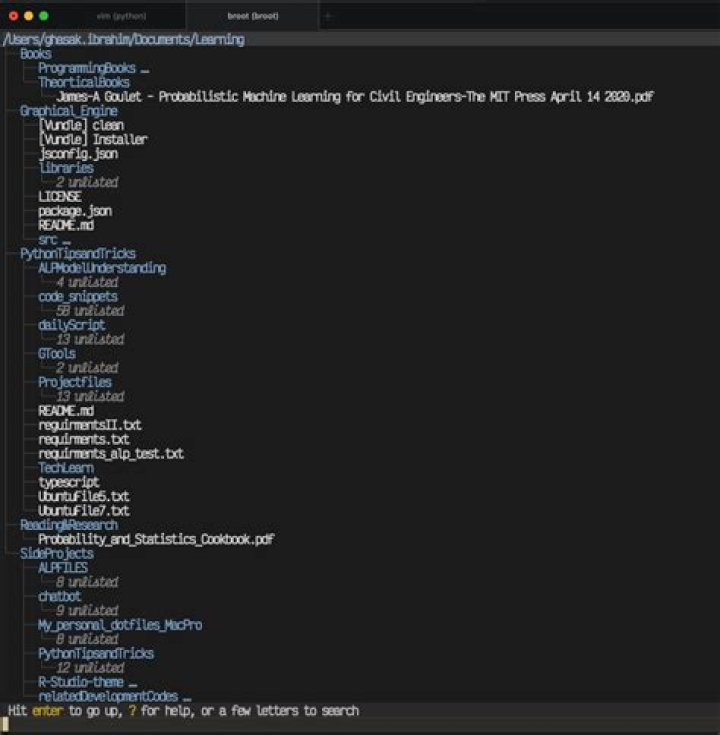
Installing broot very interesting command.
You will get the following:
- Searchability within the opened directory while navigating.
- Open your file or document with your default app. (similar to ranger) to exit use (:q)
Install on macOSX using HomeBrew
brew install broot